Ever dreamt of crafting the perfect, velvety smooth ice cream at home with your Ninja Creami, only to be met with icy, disappointing results? You're not alone, and the solution is often simpler than you think.
The Ninja Creami has revolutionized the way we approach homemade frozen treats, offering a level of customization and convenience previously unheard of. This appliance transforms simple frozen ingredients into delightful desserts like ice cream, gelato, and sorbet. But achieving that perfect texture, the one that elevates your homemade creations from good to extraordinary, can sometimes feel elusive. Too often, the promise of creamy perfection is overshadowed by the unwelcome reality of icy, grainy textures. What went wrong? And more importantly, how do you fix it?
| Category | Details |
|---|---|
| Common Problems | Icy texture, powdery consistency, crumbly ice cream, hard to scoop. |
| Causes of Icy Texture | Insufficient stabilizers, inadequate freezing time, excessive liquid in the base, incorrect ingredient ratios, freezer set too cold. |
| Causes of Powdery Texture | Improper freezing, incorrect ingredient ratios. |
| Solutions for Icy Texture |
|
| Solutions for Powdery Texture |
|
| Importance of Fats | Key to texture; too much fat prevents freezing, too little results in an icy texture. |
| Freezing Time | Base must be frozen for a full 24 hours for optimal results. |
| Ninja Creami Settings | Match settings to the recipe type (e.g., ice cream vs. sorbet). |
| Tips for Initial Spin | After first spin, use a knife along the inside edge to scrape stuck ice loose. |
| Additional Tips |
|
Often, the culprit lies in a few common mistakes. Understanding these pitfalls and how to avoid them is the key to unlocking the Ninja Creami's full potential. Many users grapple with ice cream that emerges from the machine either too icy, too powdery, or simply lacking that signature creamy smoothness. Lets delve into the common reasons for these textural mishaps and explore practical solutions to achieve that coveted, perfect scoop every time.
- Katie Ledecky Dominates Latest Wins Records Paris 2024
- Paris Jacksons Naked Dress Trend Love It Or Hate It
So, you've just acquired a Ninja Creami, brimming with excitement to embark on a journey of homemade ice cream perfection. But whispers of icy bumps forming at the top, or worse, an entire pint of icy disappointment, might have you seeking answers. Rest assured, you're not alone in this quest for the ultimate creamy texture. Let's unravel the mystery behind these icy formations and discover proven strategies to prevent them.
One of the primary reasons why your Ninja Creami ice cream might turn out icy is quite straightforward: not enough stabilizers. Stabilizers, such as guar gum or xanthan gum, play a crucial role in preventing ice crystal formation. These ingredients bind water, creating a smoother, creamier texture. Without adequate stabilizers, the water molecules in your ice cream base are more likely to freeze into larger, undesirable ice crystals. A simple addition of 1/4 tsp of guar gum can often make a significant difference.
Another critical factor is freezing time. The Ninja Creami will only work with mixtures that have been frozen for a full 24 hours in advance. Rushing the freezing process often results in icy textures and incomplete processing. A fully frozen base allows the Ninja Creami to create the right texture, ensuring that the ice cream is neither too soft nor too icy. Not freezing the base for a full 24 hours results in icy textures and incomplete processing.
- Best Metal Garden Benches Buy Your Outdoor Oasis Now
- Adirondack Homes Find Your Dream Cabin In Upstate Ny
The liquid content of your base is also a significant contributor to icy ice cream. Too much liquid can lead to excessive ice crystal formation. Its essential to maintain the right proportions of fats and liquids to achieve a smooth texture. Fats are key to a creamy consistency, providing richness and preventing ice crystals from forming. Too much fat, however, can prevent the mixture from freezing properly, resulting in a milkshake-like consistency. Striking the right balance is crucial.
Powdery ice cream, another common frustration, is often caused by improper freezing or incorrect ingredient ratios. Ensure that your base is fully frozen and that you are using the right proportions of fats and liquids to create a smooth texture. Nobody wants powdery or icy ice cream, but it can happen if theres too much water content in the mix.
Even the temperature of your freezer can influence the outcome. If your freezer is too cold, it can result in an overly hard mixture thats difficult to process. This can lead to a crumbly texture, as the Ninja Creami struggles to break down the frozen mass evenly.
The Ninja Creami comes with various settings and recipes, and some may be better suited to preventing a crumbly texture than others. Its important to follow a recipe specifically designed for the Ninja Creami and to use the appropriate settings for the best results. Match the setting to your recipe type (e.g., ice cream vs. sorbet). Different settings are designed to process different types of frozen mixtures, and using the wrong setting can result in a less-than-ideal texture.
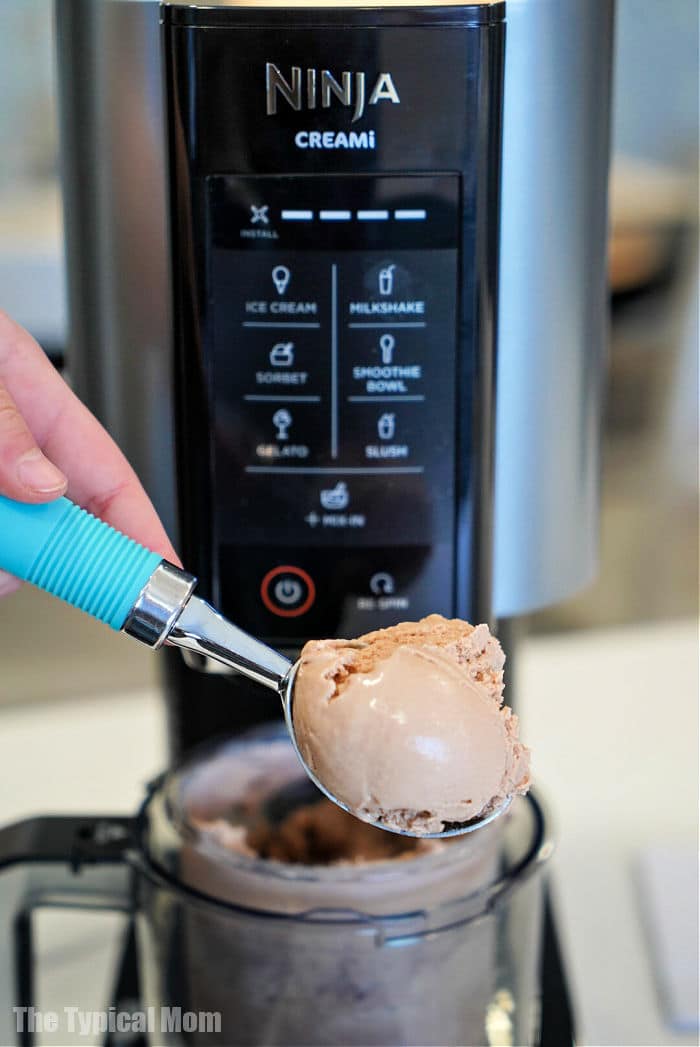
So, what can you do to rescue your icy creation? There are several methods to fix the texture of ice cream in the Ninja Creami. One popular technique involves scraping the walls after the first respin. This helps to redistribute the icy bits and ensures a more even texture. I dont stir up the icy bits after the first spin either, because then youre just further stirring icy bits into the whole thing.
Another helpful trick is to let the pint sit out for a few minutes before processing. This allows the ice cream to soften slightly, making it easier for the Ninja Creami to create a smooth texture. I usually let it sit 10min outside the freezer before spinning.
Running the container under warm water can also help to loosen the ice cream from the sides and bottom, making it easier to process. I also run the sides under hot water (like almost boiling hot) until they loosen up.
Some users even suggest microwaving the pint briefly or placing it in a bowl of hot water to soften the ice cream. However, caution is advised when using these methods, as overheating can result in a melted, soupy mixture. Use correct ninja creami settings.
When processed in the Ninja Creami, certain ingredients can lead to an icy and crystallized texture instead of the desired creamy consistency. Thats a problem. For instance, some users have found that jello, even when used as a stabilizer, can sometimes contribute to an icy texture. I think the jello is what's killing your pint in this case, even if it's an effective stabilizer.
Customization is the name of the game with the Ninja Creami. Unlike traditional ice cream makers, the Ninja Creami allows for a level of personalization that simply wasnt possible before. Experimenting with different ingredients and flavors is part of the fun, but its important to be mindful of how these additions can affect the final texture.
To illustrate these points, consider the experience of one user who added a bit of cake mix and cooked it on the stove top before freezing. Next day use it in the creami. While this experiment added a unique flavor profile, the user still needed to ensure that the base was properly frozen and that the correct settings were used to achieve the desired creamy texture.
Another user shared their technique for rescuing an icy pint: "Then after first spin take the jar out and go with a knife along the inside edge of the tub. Scrape the stuck ice loose with the knife. Then put it back in the ninja and respin once or twice (ice shouldnt be crumbly anymore)." This method highlights the importance of observation and adjustment during the processing stage.
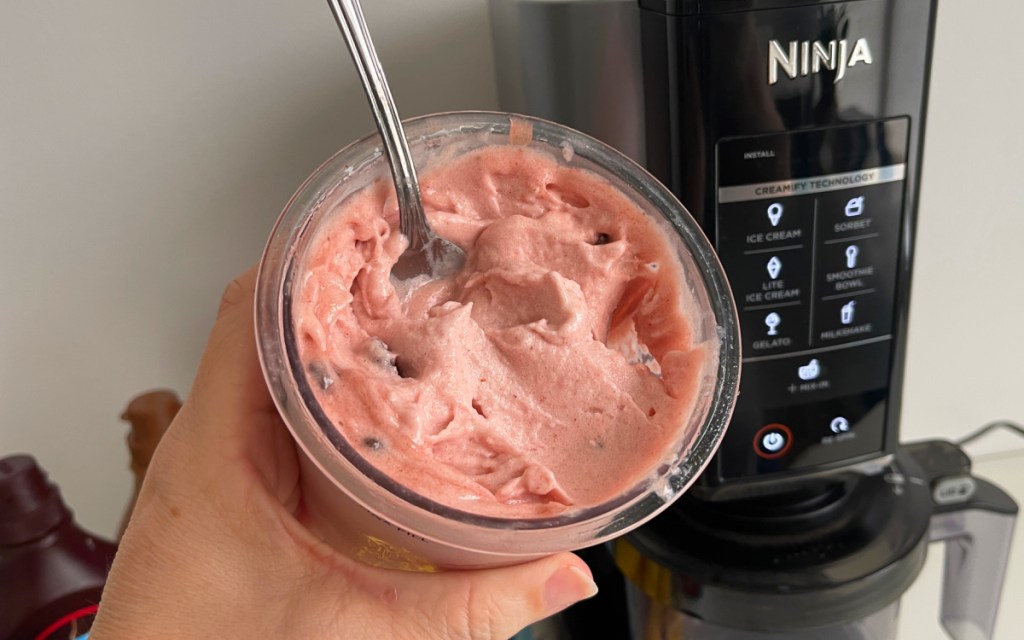
One user recounts their experience: "I was able to get almost a full scoop of ice cream. However, the texture was quite icy and a bit dry. It was technically scoopable, but with the texture the way that it was, you would not want to eat this without reprocessing it in the ninja creami." This anecdote underscores the importance of reprocessing when the initial texture is not up to par. Too icy and not creamy at all.
In contrast, another user celebrated their success: "This pint was soft enough to scoop." This positive outcome highlights the potential for achieving perfect texture with the Ninja Creami, provided the right techniques are employed.
Since adding the Ninja Creami to my kitchen arsenal, ive found that making ice cream at home has never been easieror more delightful. But even with this user-friendly appliance, troubleshooting is sometimes necessary.
Troubleshooting making ninja creami recipes. Troubleshooting making ninja creami recipes.
Let it sit on counter for 10 mins before processing.
Remember, the Ninja Creami runs for less than a couple of minutes. I measured the ninja creami running at between 71 and 81 decibels. Thats quite loud, but not much louder than the other ice cream makers ive tested. And remember, the ninja creami runs for less than a couple of minutes.
In conclusion, achieving perfect Ninja Creami texture is a combination of understanding the science behind ice cream making and mastering a few key techniques. By paying attention to stabilizers, freezing time, liquid content, freezer temperature, and processing settings, you can consistently create creamy, delicious frozen treats that rival those from your favorite ice cream shop.
Crumbly, granual ice cream out of the ninja creami is no fun, but it's easy to fix! We'll show you 6 easy ways to fix it!
If you liked this video, you might.
There are several different ninja creami models available, and it can be hard to decide which one is right for you and your family, based on features, price, and accessories. The chart below should help you decide.
Ninja creami models there are a couple of different versions. One is not necessarily better than the other. It is a matter of.
Add 1/4 tsp of guar gum.
- Drew Barrymore Jimmy Fallon Surprising Secrets Revealed
- Behind The Scenes Nude Scenes Controversy Explored